Saturday, May 23, 2009

weeks 7 & 8: egress window wells & new stair footing

Next up was the egress window wells, which meant it was time to move some existing plants that were in the way. We spent an evening transplanting the azaleas, irises and roses. We could not have done it without the ample help of friends. Thanks guys!

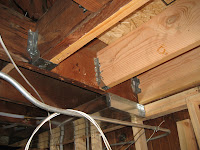
We saw a lot of Daniel and Nick of Premier Plus Construction Inc. the last couple of weeks. They dug out the area for the new egress window wells, placed the rebar and framed up the walls. They even framed the foundation stem wall for the new stairs. After the inspector stopped by to approve the work, Daniel and Nick poured the concrete provided by Miller’s Mini Mix Concrete. After twenty-four hours, they removed the forms, finished framing the laundry room and stair walls and added the positive bracing at the existing stair connections.


Randy of Brothers Concrete Cutting, Inc. spent the morning sawing the existing foundation walls for the new egress windows. Now we’re all ready for the new windows.


Tune in next time for window framing and knob & tube removal!


Saturday, May 9, 2009

week 6: MEP rough-in & stair framing

There was a lot of action this week. With the HVAC guys, plumbers, framers and electricians all hard at work, we had a full house!

Minh and Ron of Anctil Heating and Cooling finished the ductwork, installed the thermostats and relocated the dryer vent. Yay, I could finally do some laundry! After the inspection, the furnace was turned on. We were happy to get warmed up finally after almost two weeks without heat. It was a good thing that we did not start the remodel any earlier in the year or that there hasn’t been a cold snap; I’m not sure I would have made it. The new furnace is incredibly quiet, and efficient to boot. Thanks guys!


Daniil of Anctil Plumbing moved the water heater to its new location in the laundry room, moved some existing drain lines that interfered with proposed cabinetry and wall locations, replaced the soil line from the existing toilet and replaced all the galvanized lines to the existing fixtures. He also finished the rough-in plumbing with a little help from Jeff. With the new water service, all new supply lines, replaced galvanized pipes and new drain lines, the house is definitely ready for the next 100 years. Daniil, Jeff, Ben and Andy, you rock!


Daniel
, Nick and Ralph of Premier Plus Construction Inc. began preparing the new stairs. They removed the existing stairs, walls and flooring, dug out under the existing deck for the new footing, placed the rebar, cut out an opening for the new stair run and laid out the new treads and risers. As working with existing stairs in older homes tends to be tricky, the inspector was called for advice on the constraints posed by the preexisting stair well. We were lucky that the stairs did not require any major structural upgrades or reconfigurations. We were given the go ahead to pour the new footing. Whew!


I felt even more relieved when our structural engineer stopped by the following week to take a look at the existing stair framing. The stairs were framed out with single 2x10s. There were no straps connecting the headers to the post, the joists were not on hangers and nothing was even toenailed. Seeing all of that had made me nervous. Granted, the house has stood for nearly a hundred years without incident, and the lumber used in its construction are larger and far denser than what is used today, but it seemed as if gravity and friction were what was keeping that corner of the house together. After assessing the now exposed framing, the engineer felt that we had nothing to worry about. Still, a few positive connections of hangers and straps wouldn’t do any harm.

Aaron of Portland Metro Electric began removing all the old, crazy wiring and weird junction boxes. He also started placing the recessed cans, outlets and switches. With the electrical in place, the spaces seem more and more real.

I talked to Tom from Western Pacific Building Materials Inc. about the door order. We walked through the framed-in basement and reviewed each door location, swing, style, threshold, jamb, hardware and detailing.

Tune in next time for the egress window wells & the new stair footing!


Saturday, May 2, 2009

week 5: framing & rough-in plumbing

The basement has finally taken shape! Daniel and Nick of Premier Plus Construction, Inc. framed out the space in three days. The wall framing makes the project seem all the more real. It’s very exciting to see the different spaces in real life after almost three years of dreaming about them on paper.


Minh and Ron of Anctil Heating and Cooling installed a little more ductwork. We are patiently waiting for our heat to come back on. Daniil of Anctil Plumbing rerouted more plumbing and continued the rough-ins.

Tune in next time for the electrical rough-in & stair framing!


Sunday, April 26, 2009

week 4: heating & cooling

The third week, we had a little respite from the initial whirlwind of activity. We used the time to select the AV equipment, created the wall framing plan and details for the TV & speakers, respecified the wine cellar racking and cooling unit, refined the exterior paint scheme, and reexamined the interior colors and interior lighting.

In looking at the lighting, I had become concerned that the new ducting for the two-zones and the lighting would conflict, but as soon as Tom Anctil of Anctil Heating and Cooling arrived with his team at the start of week four, all my fears melted away. Minh and Ron reviewed the locations of the ducts with us, making sure that the supply and returns did not interfere with any lighting, cabinetry or architectural accents. They also installed the new ¾” gas line. Hopefully, in a little over a week, the new high-efficiency furnace will be fully installed. Relocating the furnace from the center of the basement to an exterior wall opened up the plan, improved the flow and increased the ceiling height where we needed it. We are very pleased with the work by Anctil Heating and Cooling.


Daniil of Anctil Plumbing, Inc. returned to reroute the existing plumbing and Ben installed the new water service. Lucas and his team from Rose City Contracting, Inc. removed the asbestos-covered ducts in half a day. Things were buzzing along.


The inspector stopped by and pointed out a few minor things from a previous remodel that will need to be addressed during construction. Yes, that is correct, the city inspector made a house call. This project is a part of Portland’s Field Issuance Remodel (FIR) Program. In this program, the inspector comes to the home before the start of the project to review and approve plans and troubleshoot potential code issues. On the subsequent visits, he performs the inspections and issues the permits. This single point of contact with the city allows for greater efficiency and project continuity. Ultimately, the FIR Program encourages code compliance in remodels and additions because the process is so smooth, easy and less costly for the home owner.

We also consulted Ron Cowan of Stellar Cellars about storage racks and a cooling unit for the wine cellar. We liked Ron because he is very knowledgeable of cellar systems and design, is extremely helpful, has an eye for detail and quality and is right here in Portland. Ron explained cellar design, lighting, insulation and weather-stripping, wood specie selection, millwork connections and detailing, cooling unit positioning (and camouflaging), among other things. The other companies we talked to were just area sales reps who did not really know the ins and outs their products.

We celebrated Earth Week by de-nailing and cleaning up the TNG boards for one friend so he could reuse it in his home and for another friend for picture frames. With the ample help of our buddies, we were able to salvage 2000-3000 lineal feet of the CVG Douglas Fir TNG v-groove board. Thanks guys, you are the greatest!


Tune in next time for framing & more rough-in plumbing!


Sunday, April 12, 2009

weeks 1 & 2: deconstruction & rough-in plumbing

The deconstruction team from Premier Plus Construction, Inc. came out (the day after contract signing, no less) and gingerly removed the CVG Douglas Fir TNG v-groove board that lined the walls and ceiling. It took Daniel and Nick three days to remove nearly 4500 lineal feet. We gave it to a friend who will reuse the material in another improvement project. We are very happy it will go to a new home rather than a dumpster or as landfill.


The concrete slab was cut by Antonio and Jordan of Brothers Concrete Cutting, Inc. in a couple of hours, and the rough plumbing was installed by Andy and Daniil of Anctil Plumbing, Inc. in three days. After the rough-in was inspected, the concrete was poured by Michael Stearns and Gene of Accu-Pro. All this in two week’s time!


I am STILL tweaking the design and fine-tuning finishes. Architects make the worst clients. Granted, the design rework was due to an excellent idea that came about during the bidding phase and the reselection of some of the finishes was an effort to maximize aesthetic effect per dollar, but it makes me nervous to be doing this during construction as I do not want to adversely affect the schedule. Dawn Strout and Marc Stumpf over at ecohaus and Hilary Noah of Dal-Tile were extremely helpful in the selection of materials that give the most bang for the buck. Thanks, you guys are the greatest!

The one item that delayed the project was the window selection. I had a difficult time settling on a product style, but in the end selected Marvin’s Ultimate Wood windows. Mark Bell and Andrew Haslam of Classic Sash and Door Company did a marvelous and thorough job, and patiently explained all the available options. I don't know how we would have done it without all their assistance.

We are also looking at how to best layout the AV equipment, something that should have occurred much sooner, as it potentially could affect the framing plan. We talked at length with Teri Inman of Stereotypes about AV equipment and their requirements, and feel certain that everything is in order. Teri, you rock!

Tune in next time for the new furnace installation!


Sunday, March 15, 2009

hiring the contractor

It was a tough choice as all the contractors we interviewed were great, and we felt we would be happy with any of them. In the end we hired Erik Ostmo of Ostmo Construction. During the bid process, Erik was extremely customer service-oriented and willing to work with us on refining the design and the bid. Communication was very easy and clear, and he took the time to explain things. He gave us a thorough and complete bid. The bid was also “open book” which made it easy to reevaluate some design and material choices. Having visited one of his projects, we were impressed by the quality and craftsmanship of Erik’s work and his attention to detail. He gave us confidence that he had the necessary skills and was the best man for the job. We also felt that he was a very good value. He wanted the job and he made us want him to do the job. Simply put, we liked him.

After we hired Ostmo Construction as our contractor, there was a month dedicated to “project start up” items when the contractor scheduled his crew and subs, ordered materials and the like. We used this time to tweak the design a little. During the bid process, other design opportunities came to light. We decided that moving the furnace to an exterior wall, placing the water heater in the laundry, rotating the wet bar and family room, and creating an AV Storeroom was best.


To recap the schedule, the below outlines a realistic timeframe for a similar project:

1 month: interview and hire architect
4 months: design
1 month: get bids and interview contractors
1 month: review bids and select contractor
1 month: pre-construction project start-up
4 months: construction
1 month: post-construction move-in

As some of these phases can overlap, the total time for a full remodel from start of design until the end of construction is about 6-12 months.

We can't wait for the deconstruction to begin. Whoohoo!


Sunday, March 8, 2009

comparing the bids

Having a finished design and complete set of drawings and specifications ensured that we got more accurate bids that could be directly compared with each other. The contractors took about a month to put together their respective bids. Each contractor presented their bid in an hour-long meeting. During the meeting, we:

  • Skimmed the bid to get the gist of the proposal (note: the bottom line number is not really the bottom line).
  • Asked questions.
  • Reread the bid and looked for what was included and not included, or included as a line item or option. For us, these items were plumbing and electrical options, HVAC equipment, light fixtures and appliances.
  • Asked about the options or line items.
  • Asked how change orders are handled.
  • Asked about the payment schedule.
  • Asked what happens if something were mistakenly omitted from the bid.
  • Added the desired options and items that were not included. This became our revised bottom line number.
Keep in mind that the bid is really a ballpark figure. During construction, there will be change orders due to materials or finishes being discontinued or unavailable in the project’s time frame, client changes, better construction techniques, pre-existing conditions and surprises inherent in older homes. It’s best to think of the bid as the financial starting point of the project.

What we most appreciated was that the bids were transparent and open-book. They indicated what and how the contractor was thinking about the project. Because they were itemized, we knew exactly what we would be paying for each service or material. In essence, we knew what the subcontractors’ had quoted to the general contractors. This allowed us to make educated decisions on where we could shave costs.

Despite the transparency, it was difficult to compare bids directly as each contractor bundled the numbers slightly differently. I ended up creating an Excel spreadsheet based on construction industry standards established by the CSI to decipher the differences between bids. In doing so, I was able to identify areas where the contractor was a little high or low, and then ask the contractor about the discrepancy. The most common reasons for cost variations were: (1) my misunderstanding of the bid, (2) the contractor’s or sub’s misinterpretation of the drawings, specifications or scope or (3) omission or oversight by the contractor or sub.


Creating the spreadsheet was well worth the effort to better understanding the bids. At first glance, the bottom line numbers looked like they differed only by 4%. After doing the detailed analysis through the spreadsheet, we discovered that the spread between the three bids was more like 11%. This was not too surprising given the varying experience levels, sizes of company and amount of overhead.

It was clear that we would be happy with any of the contractors as the client references all spoke highly of their respective contractor. Having visited completed projects, we were confident that each contractor could produce the level of quality we desired. All the contractors and their subs were licensed, bonded and insured. Everyone seemed likable and trustworthy. It was difficult to have to select just one.

Tune in next time for hiring the contractor!